User Access Manager Plugin is used to create user groups. User groups are based on custom user roles, one user group should match one custom user role. So before you start to create user groups, you should add custom user roles in your system first.
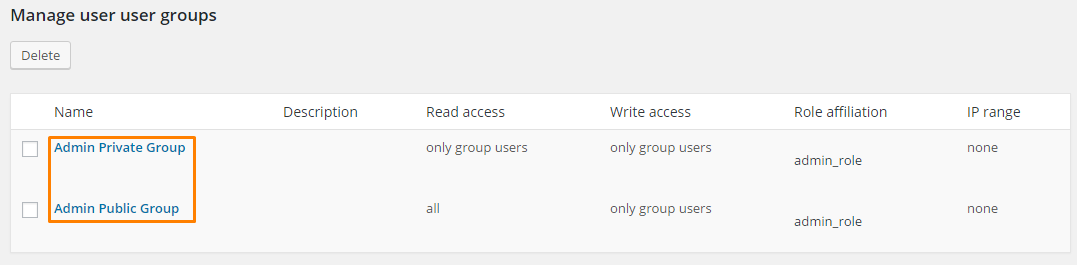
Go to UAM tab, there are two user groups here by default. Admin Private Group means only admin can read and edit content in this group, used to store some system resources, like logo. Admin Public Group means only admin can edit the content in this group but everyone can read it. Please do not delete these two groups.
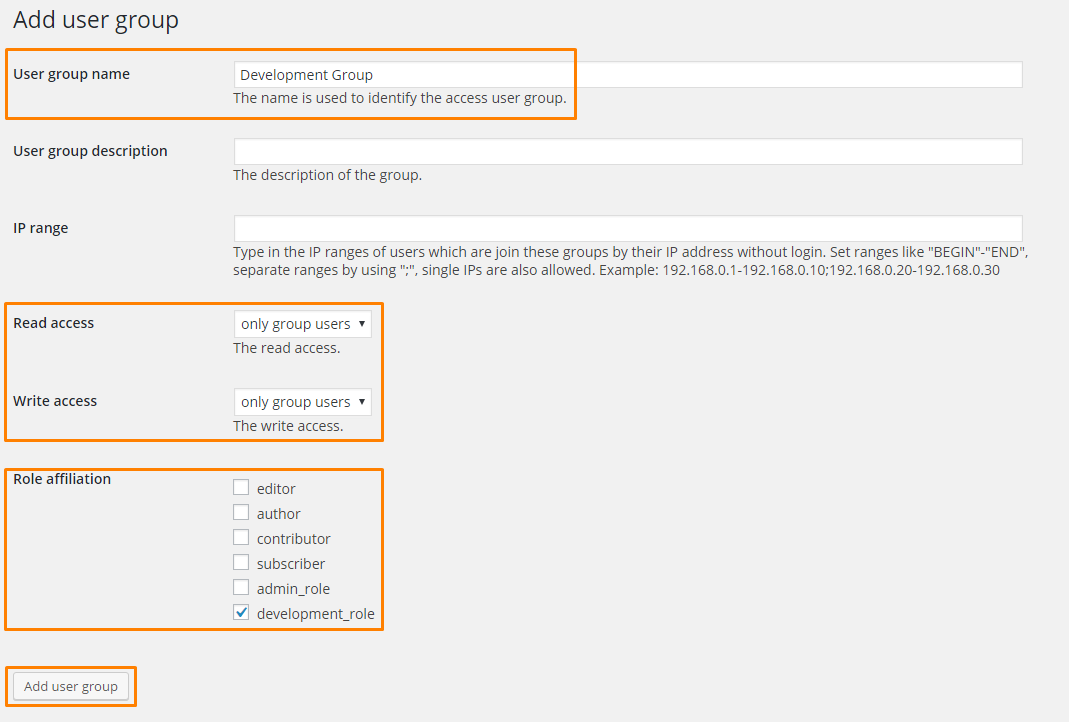
Scroll down to Add user group section, input the User group name. For ease of identification, this name should match the custom user role name, for example, if the custom user role name is Development Role, then the user group name should be Development Group.
Select the Read and Write access rights, only group users means only user in the same group can read/write this item, all means all user can read/write this item.
Select the Role affiliation, we do a one to one match here, so do not do a multi select, just select the related role, in this tutorial we select development_role. Then click Add user group button. Based on how many custom user roles you have, you should repeat this operation until you finish adding all user groups.